Generating a SSH-2 RSA key
If you have a pfSense box connected to the web, you’re very likely to see scans from China or Russia looking for open SSH ports. Once these bots have found your running SSH that’s exposed to the web, they’ll begin trying to brute force your password or run some kind of exploit against your box.
You can either:
1) Don’t allow your SSH server to accept connections from outside your local network
or
2) Change SSH to listen to a non standard port and enable the use of keys
Changing the default port from 22 to something different is not security. What it does do is help reduce the number of malicious connections that are coming from bots scanning the entire Internet for everyone that has port 22 open. In order to use a key with pfSense we need to generate a key, I’ll be using PuTTYgen in this tutorial. Available here
Launch PuTTYgen and it should look close to this
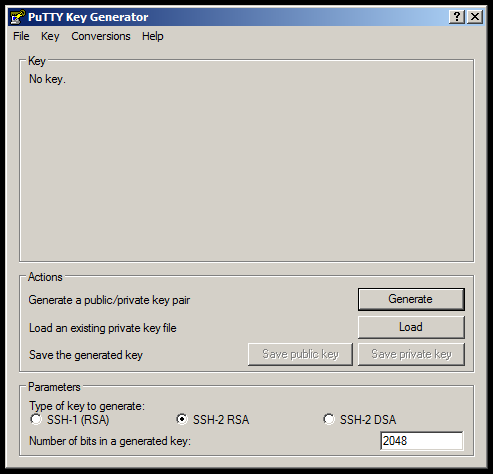
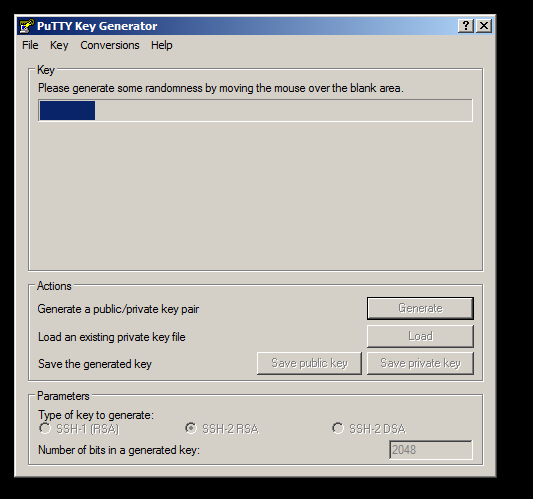
The type of key I’m going to use is a SSH-2 RSA. Click on Generate and move your mouse around until the progress bar has completed
Pick a comment for your key if you’d like, then pick a good passphrase because you’ll be using this in addition to the key file when connecting via SSH.
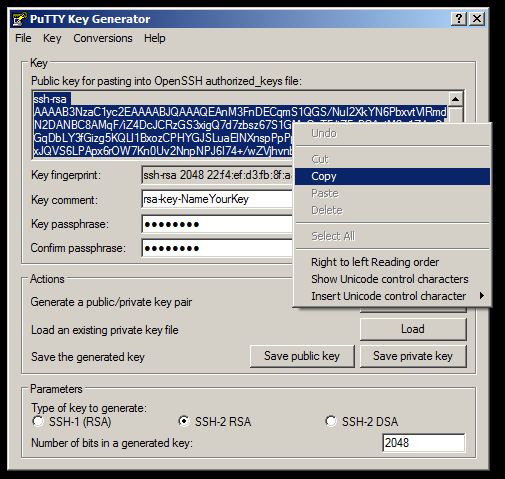
Click on Save private key and keep this in a safe place. If you ever need to open your private key in PuTTYgen again you’ll need to enter in your passphrase, you will also need to enter the passphrase each time your connecting with SSH.
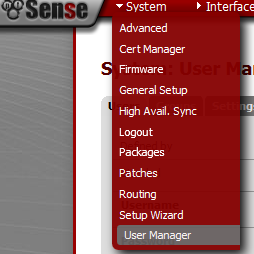
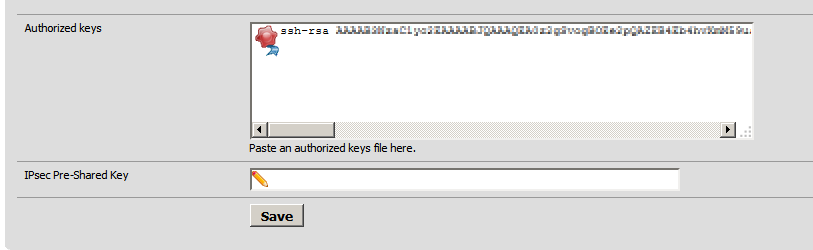
Copy all of the text for the public key at the very top of PuTTYgen and from the pfSense webgui navigate to System \ User manager
Select your user and click on the Edit button to the right

Scroll down to the bottom and paste your public key inside of the Authorized keys text box.
You want this to be all on one line then click Save
From the System \ Advanced menu scroll down to the Secure Shell section
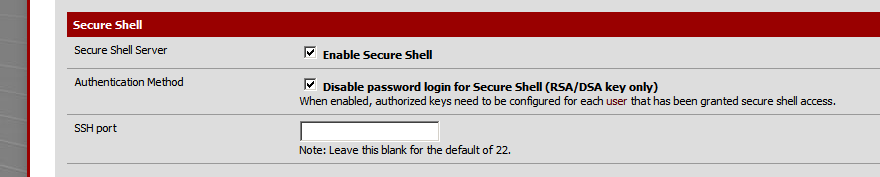
If you enable Authentication Method Disable password for login with Secure Shell, it forces all SSH connections to use the key we just created, or one of the key files if you have setup multiple users. You will still have to enter your passpharse for the key that was created and this greatly increases your SSH security as a passhrase is useless without a key and vice versa.
Configuring PuTTY to use a SSH Key
From the menu on the left, navigate to Connection \ SSH \ Auth
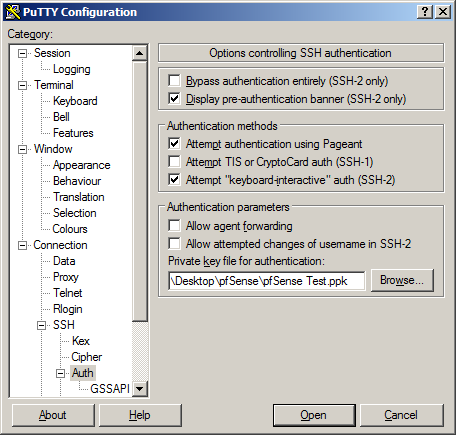
Click on Browse and pick the private key that was generated previously and click on Session \ Save so we don’t have to enter in the key file every time we’re connecting
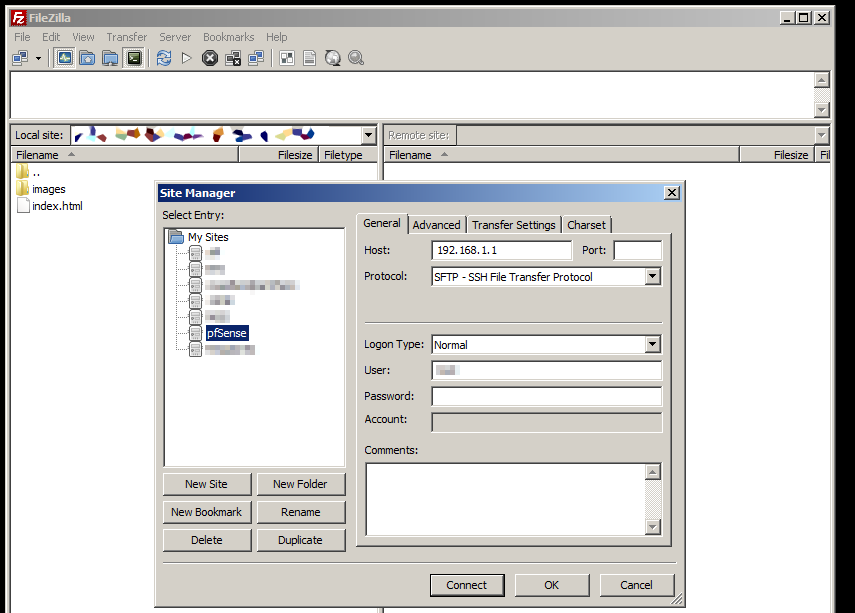
Configuring FileZilla to use SSH keys
From File \ Site manager lets create a New Site and enter in the address for our pfSense box, SFTP as the protocol and our username. Don’t put in your password as FileZilla doesn’t support SFTP with keys + passwords, it will only authenticate on the username and key file only.
Now go to Edit \ Settings and navigate down to Connection \ SFTP and it’s time to add our keyfile we created earlier. A message will popup saying that the “keyfile is password protected and using passwords with keys is not supported yet, would you like to convert it to an unprotected file?” Choose Yes and it will prompt you for the passphrase that was created when the private ssh key was generated, then pick a new file name so we don’t overwrite the password protected key (I used pfSense Private FileZilla.ppk) and save. Now you should be able to click on Connect from the Site Manager and have SFTP access to your pfSense box.
Using Squidblacklist.org lists with SquidGuard running on pfSense
I found Squidblacklist.org but didn’t see much discussion about using the lists with pfSense but soon found out why. In order to use the lists from Squidblacklist.org first we need to download this updater and transfer it to your pfSense box.
Tested with squidGuard-devel 1.5_1.1 beta and squidGuard 1.4_4 pkg v.1.9.6 platform: 1.1 running on pfSense 2.1.5
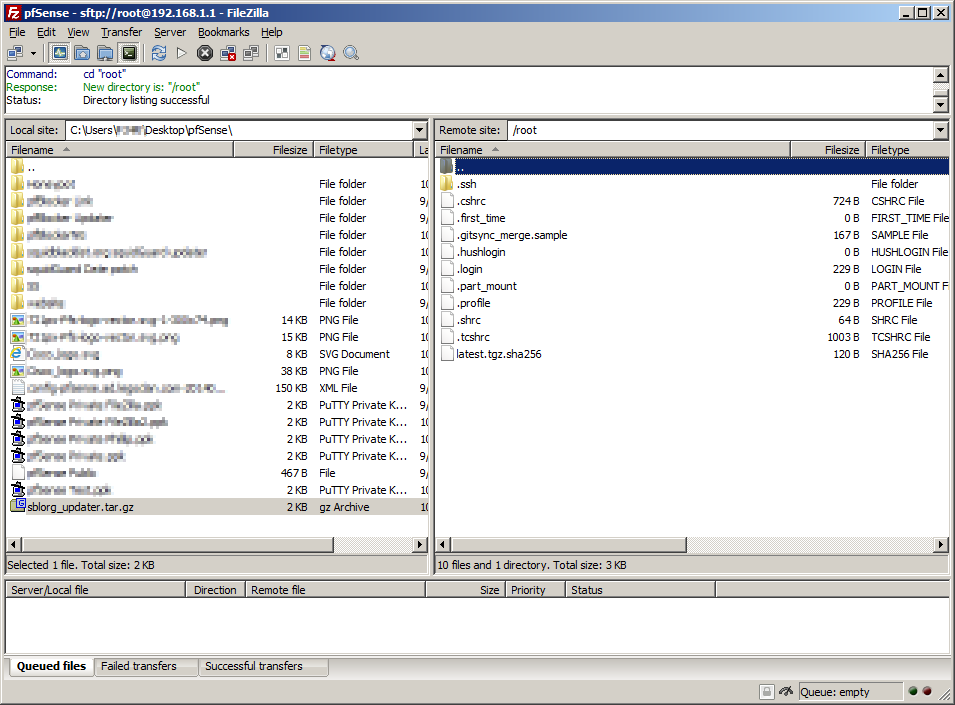
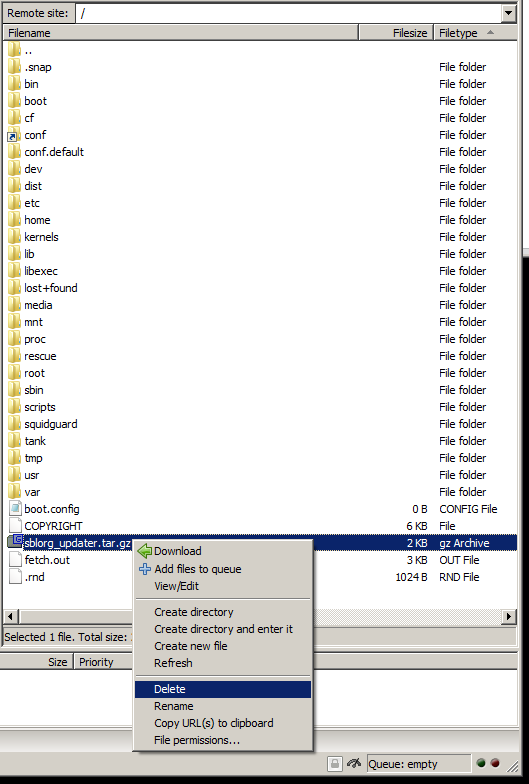
Using FileZilla I’ve connected to my pfSense box (remote site) and navigated to my sblorg_updater.tar.gz location (local site)
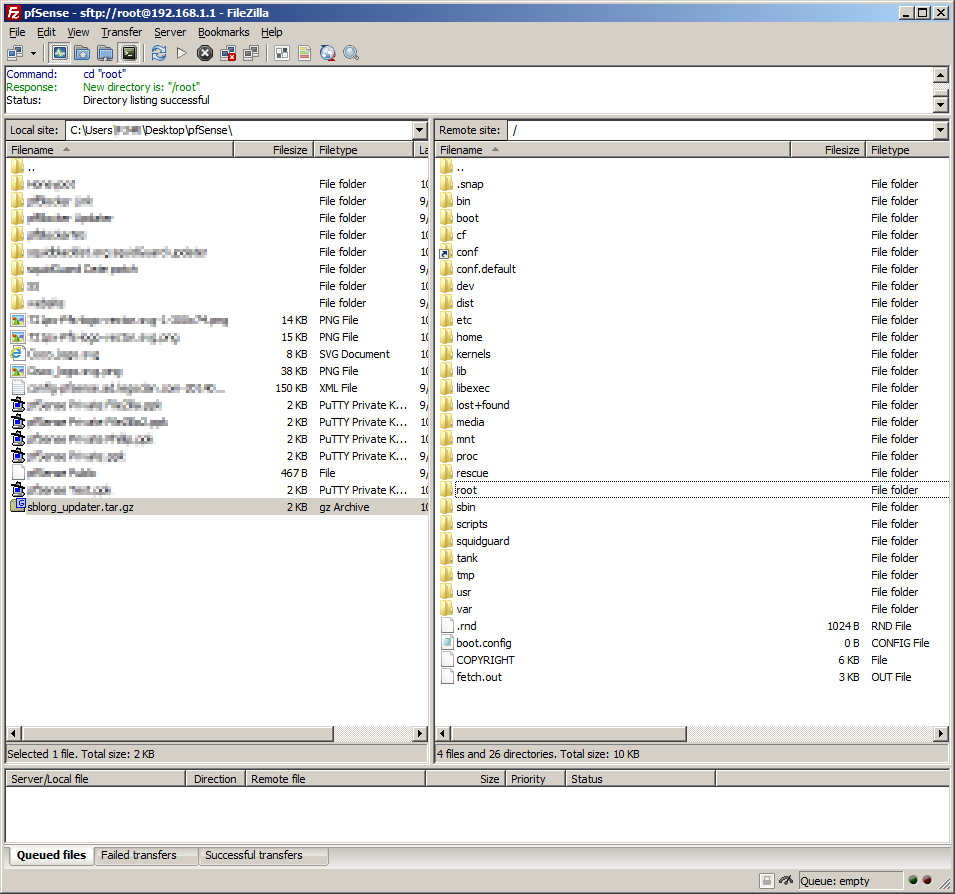
Currently on the remote site were in /root and need to go up one level to / to do so we double click on the folder labeled ..
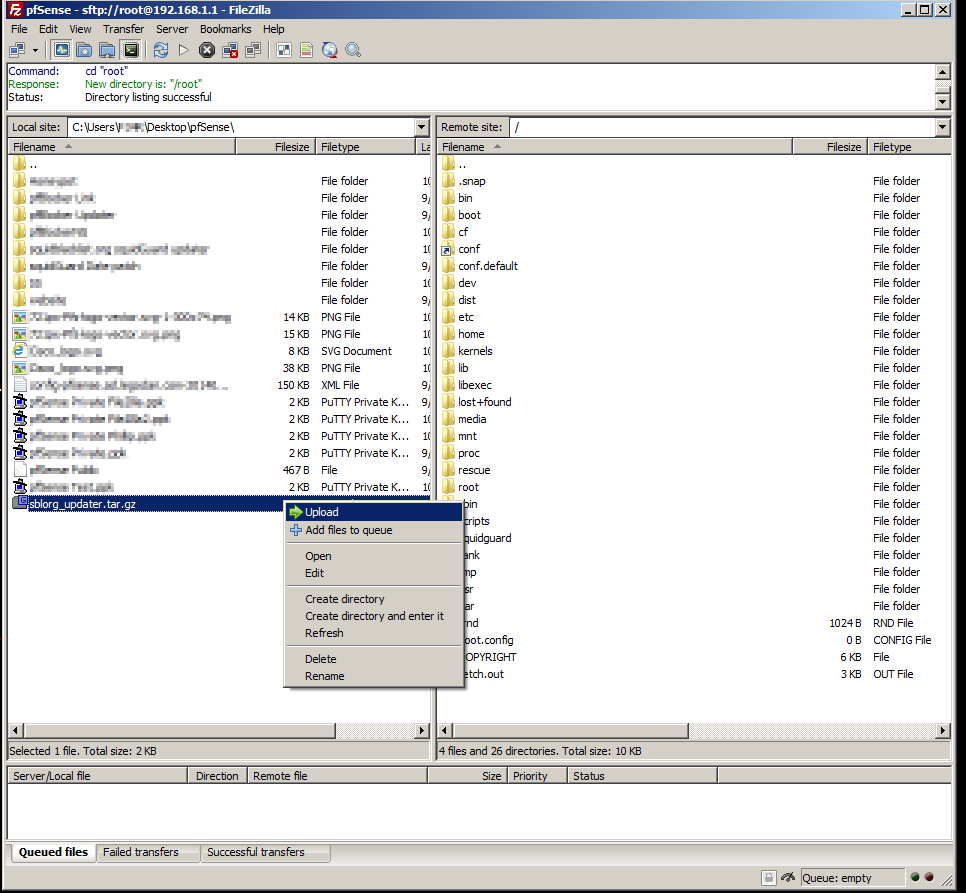
To transfer our sblorg_updater.tar.gz file to our remote site (pfSense box) right click on the tar.gz and choose Upload
You can also drag and drop files from the local site into the remote site
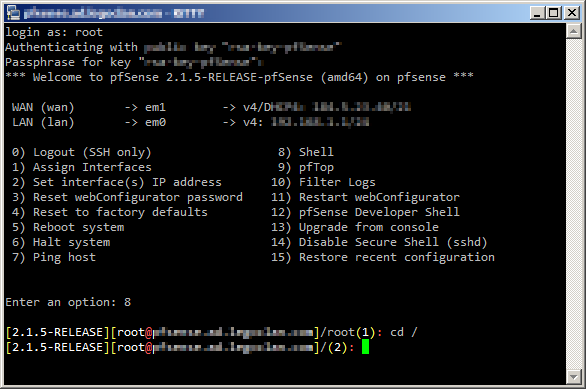
Connect to your pfSense box with PuTTY and choose option 8) Shell
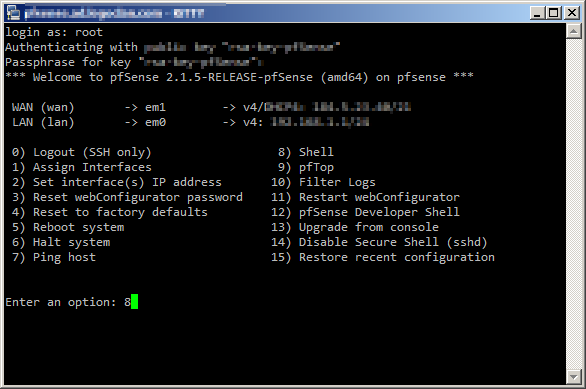
change directory to / by typing cd / then pressing enter
now we can extract our archive by running the command
tar -xf sblorg_updater.tar.gz
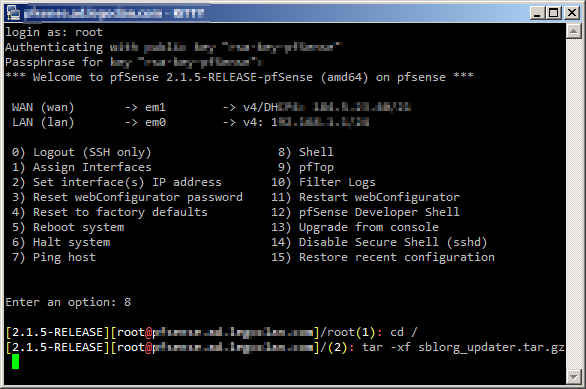
Our archive is now extracted to /usr/local/pkg/Squidguard/
Using FileZilla we can delete our sblorg_updater.tar.gz file as its no longer needed
With FileZilla navigate your remote site to /usr/local/pkg/Squidguard/ then right click on SquidGuard_blacklist_download.sh and choose edit. If FileZilla doesn’t open this with your default text editor just pick notepad and edit the URL in the image below with your current username and password then click file \ save. FileZilla should detect that the file has been changed and prompt to upload the file back to the server, choose Yes.
Note: You must have a colon in between your username and password

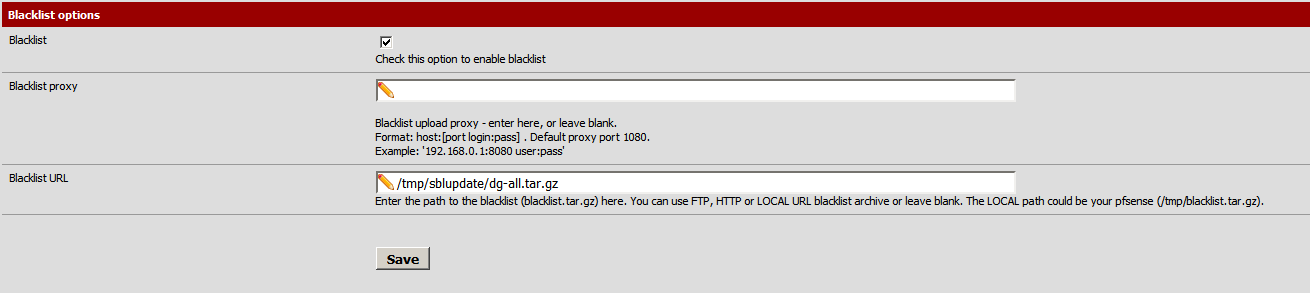
From the pfSense web interface navigate to Services \ Proxy Filter and scroll down to the bottom.
The Blacklist URL is going to be /tmp/sblupdate/dg-all.tar.gz the script that was extracted earlier is going to log into the squidblacklist.org website, download the blacklist, change the file names to work with the pfSense version of SquidGuard then save a local copy.
We need to update our blacklist every so often to have the latest and greatest list. If you do not already have the Cron package installed, go to System \ Packages \ Available Package and click on the + next to Cron. Now go to Services \ Cron and from the bottom right click the + sign to add a new cron job.
You must put in a value for the hour and minute (24 format). My example below would run at 1:23 AM every day of the year.
The command to run is /usr/local/pkg/Squidguard/squidGuard_blacklist_download.sh
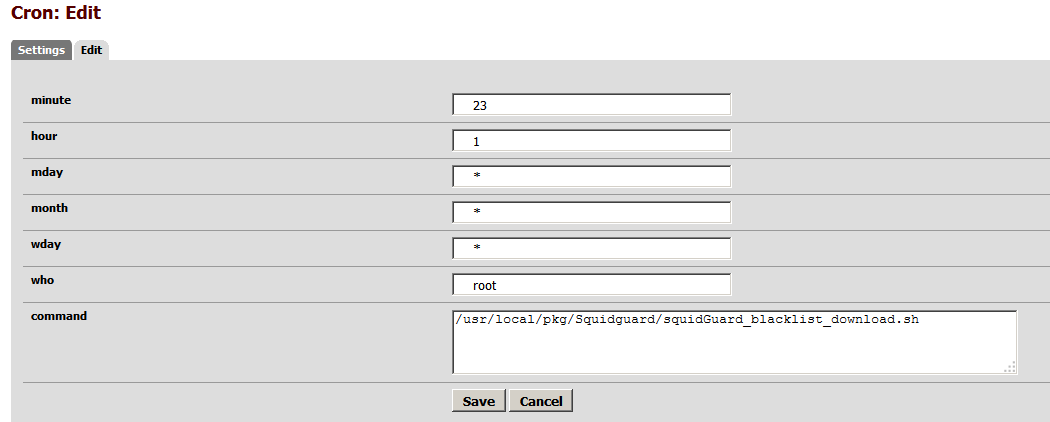
Click on save and your blacklist for SquidGuard will be updated daily at whatever time you picked.
From Services \ Proxy Filter \ Common ACL this is where all the blacklist categories are available. The group for new TLDS doesn’t work with SquidGuard on pfSense mainly because were using the blacklist made for DansGuardian, as the SquidGuard on pfSense is not like SquidGuard on other platforms.
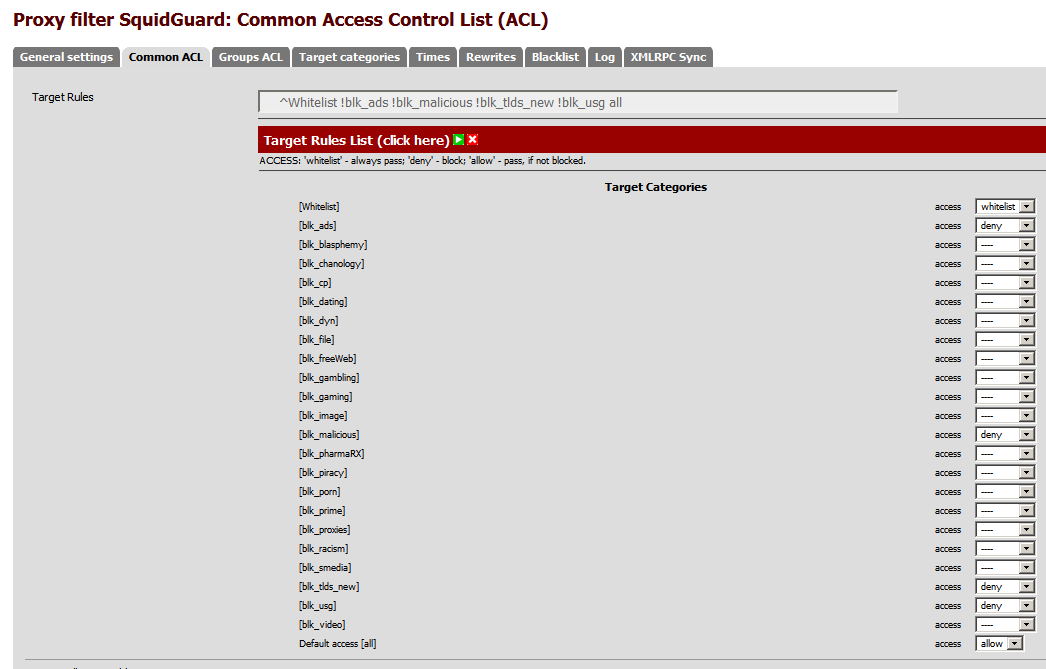
Pick which lists you want to deny and hit save.
FreeDNS
When creating your DDNS entry for FreeDNS the only fields required are Service Type, Hostname, and Password.
The password is your authentication token from FreeDNS, it’s not your FreeDNS account password.
Login to http://freedns.afraid.org/dynamic/ and copy the “Direct URL” link for the hostname you want to update.

Example – freedns.afraid.org/dynamic/update.php?Ui0ylkVF3VRTT4lBQUkdSm9K7ToyN3I1MDu2
Your authentication token is everything from the right of the question mark, in this example Ui0ylkVF3VRTT4lBQUkdSm9K7ToyN3I1MDu2 would be my password.
pfBlockerNG – Advanced Inbound Firewall Rule Settings
With pfBlockerNG you can block inbound traffic from an entire country but what if I want to allow select traffic through the firewall?
Example – Using the Country tab I chose South America, I need to allow inbound traffic because I have a web server or some other type of service that people in South America need.
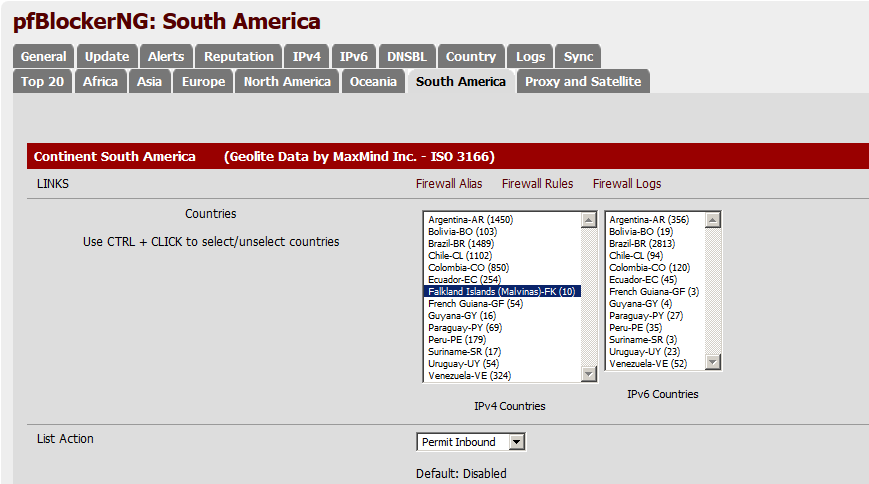
For this example I picked Falkland Islands and Permit Inbound then scrolled down to Advanced Inbound Firewall Rule Settings
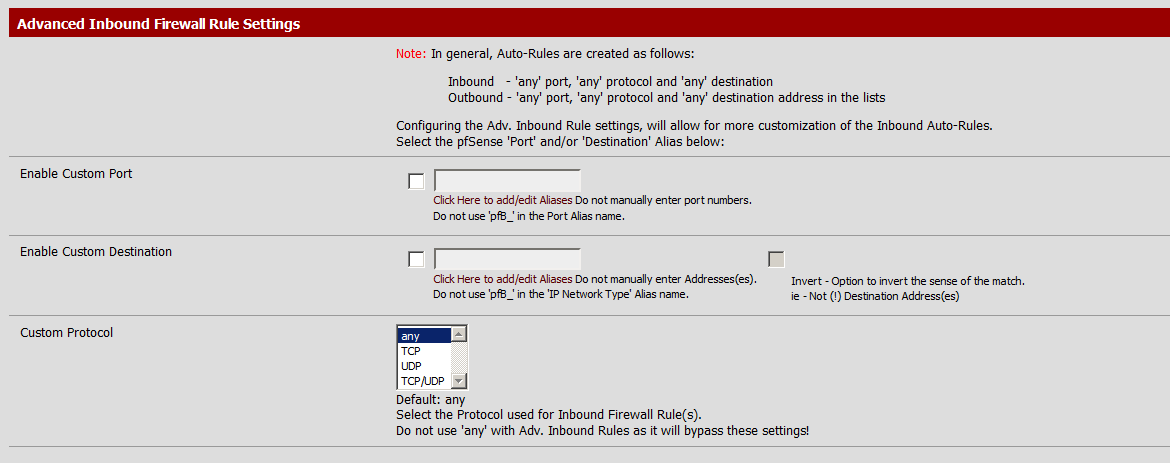
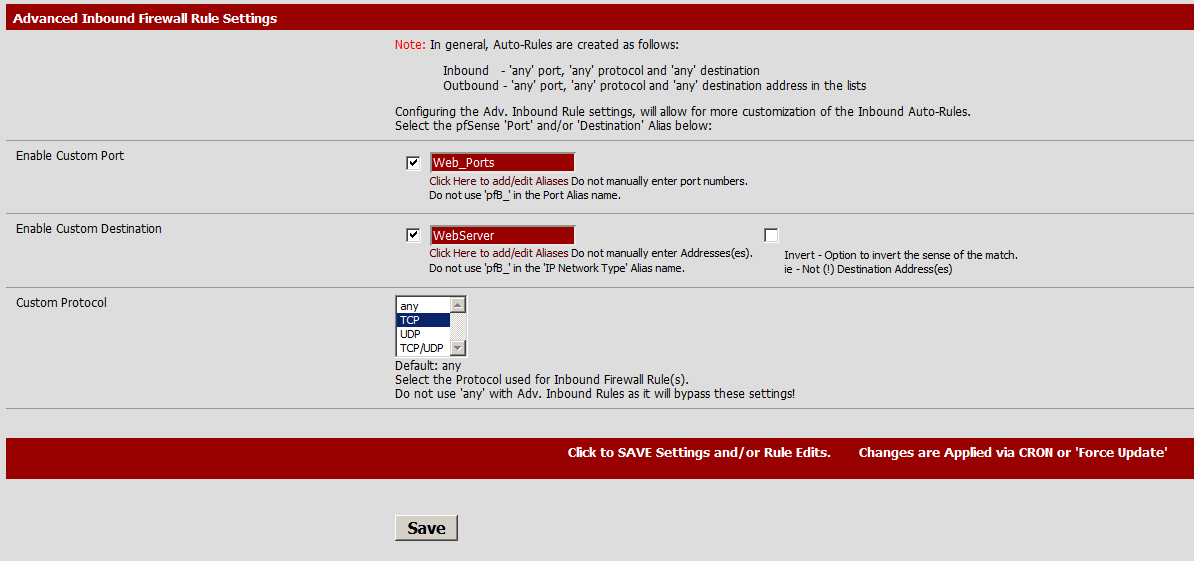
The custom port and Custom Destination must be the name of an Alias.
Both text boxes have a link “Click Here to add/edit Aliases” that will take you to the correct page.
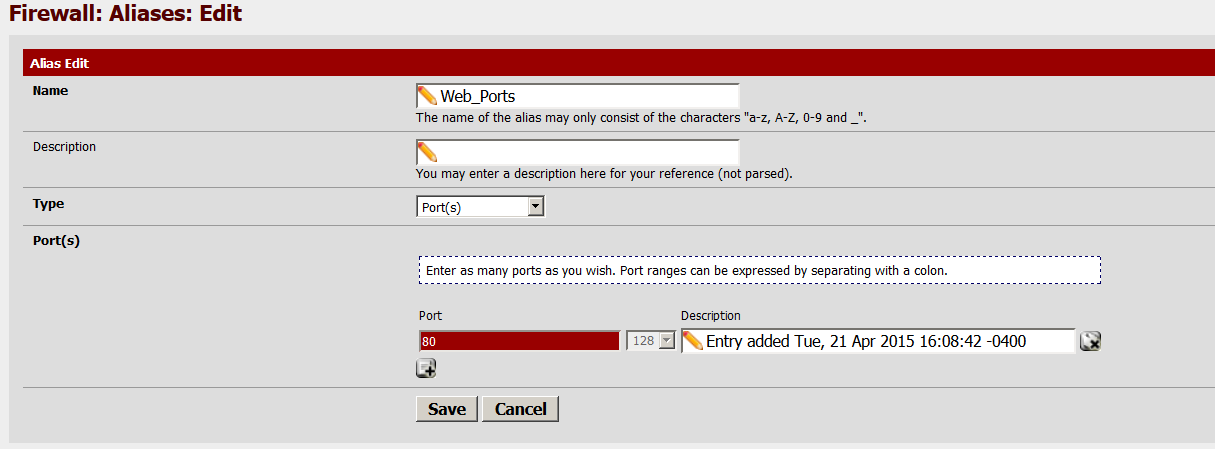
My port alias is called Web_Ports with a single port 80 selected. You can enter additional ports if needed by using the + sign above Save.
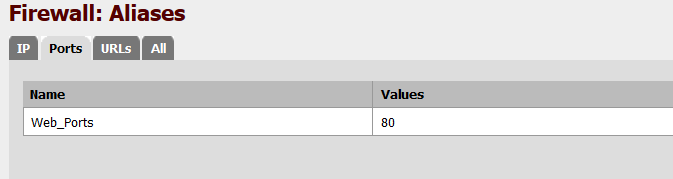
Once saved it should look similar to the screenshot below
Now to setup the IP alias for our destination network
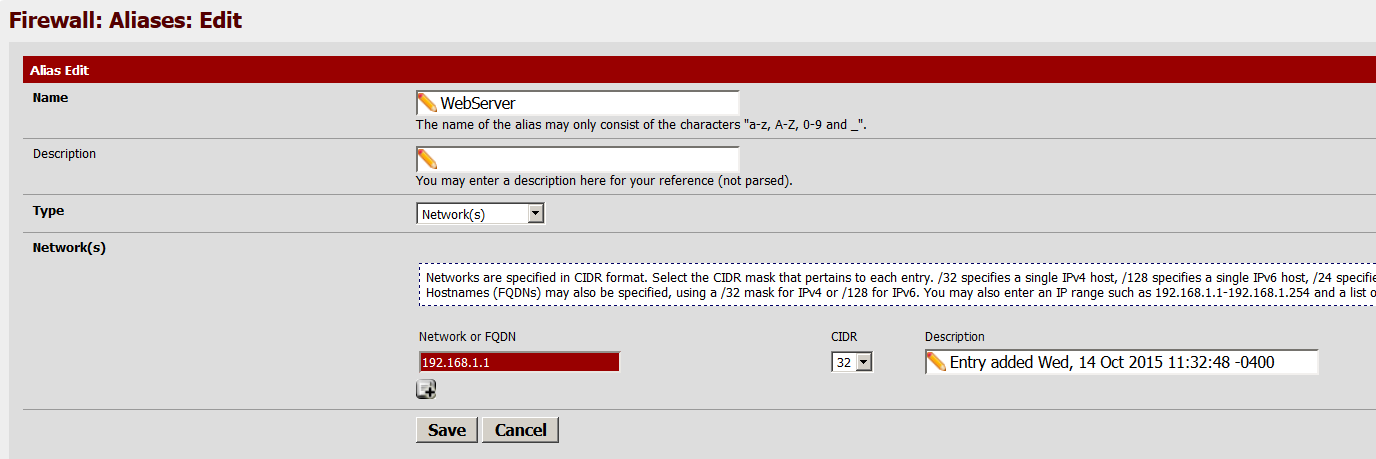
My alias is called WebServer and the type has to be Network.
If you have more than one internal address that needs inbound access add them now.
Save
Our advanced inbound firewall rules should look like this now
Click save then switch to the update tab of pfBlockerNG and force an update.
The new rules we added wont be created until after a scheduled or forced CRON job or update.
Now that we have our rules setup a NAT port forward needs to be setup to direct incoming HTTP to our web server, since were using pfBlockerNG to manage our rules make sure the entry for “Filter rule association” is set for none.
Now any inbound connections from the Falkland Islands will be allowed to access my web server on port 80 and only 80.
You may need to adjust your rule order as rules are processed top to bottom. From the General tab in pfBlockerNG scroll down to Rule Order

Adjust the rule order as needed to fit your environment

Did I leave out any important information or not answer any of your questions?
Please contact me